Colour negative scanning
This method of inverting a colour negative is superior to most scanner software and Silverfast / Vuescan inversion in terms of highlight retention and reliability of colour reproduction, however may not provide ideal colour balance out of the box.
The instruction below may seem quite overwhelming, but once the photoshop is set up and some practice with colour correction gained, it only takes 10-20 seconds to process a single frame.
A. Scanning

Scan your negative in Vuescan, using the settings above. It is good to start from the default settings set, so reset all tabs beforehand if you have been using your copy of Vuescan.
Screenshots above show Vuescan settings with Nikon 5000ED connected – if you are using other scanner they may look differently, however the most vital options should be the same.
B. Photoshop preparation (once)
– Copy the inversion curve file to the root folder of C:/ drive
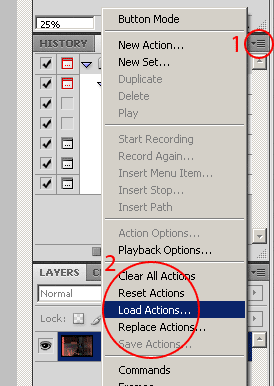
– Load the scan action by clicking on the Actions options (1) and selecting “Load Actions” (2)
C. PS action preparation (once per roll)
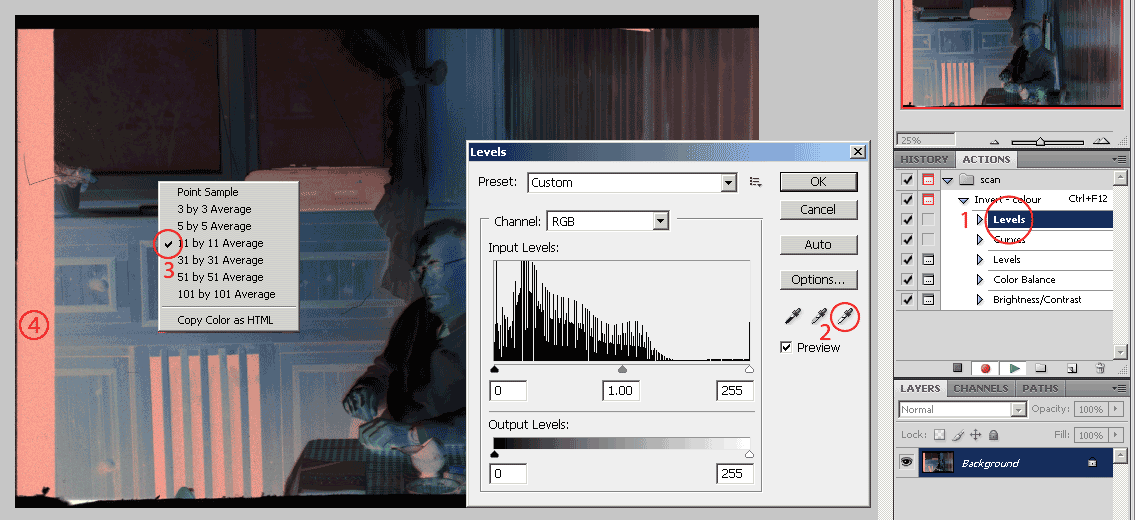
– Once the action is loaded, unfold it and double-click the first step (1).
– Click on the white eyedropper (2), right click on the image, make sure that the sampling area is 11×11 (3) and left-click on the film mask (4). If your image does not show any mask, scan an empty frame.
– Press OK on the Levels window
– Press CTRL+ALT+Z once to get back to the original image.
D. Inversion
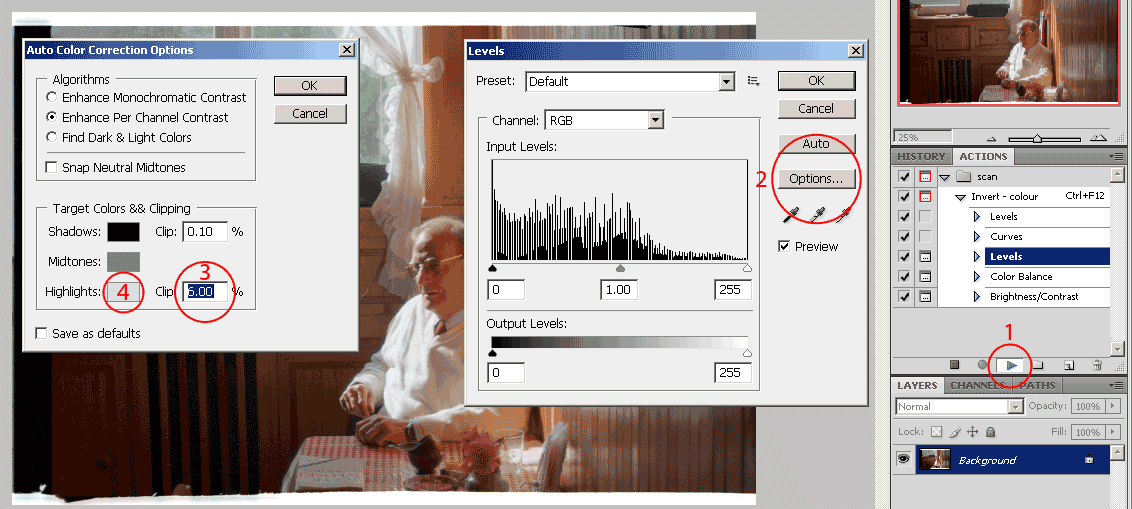
– Press CTRL+ALT+F12 or select the “Invert – colour” action and click the start button (1)
– Levels will show up. Click on Options (2)
– Click on the Highlights / Clip value (3), press SHIFT and scroll the mouse wheel up. Stop when the overall colour balance seems just right (don’t worry about clipped highlights)
– Click on the rectangle near Highligts (4)
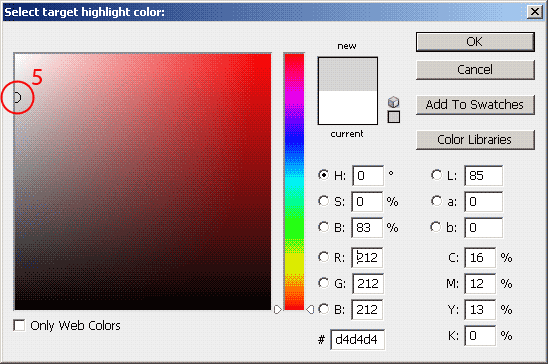
– Move the colour picker down along the left side to restore the highlights (5)
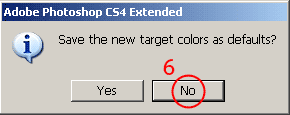
– Click OK on the Select Target window, on the Auto Colour Correction window and then on the Levels window.
– Select NO when the pop-up window appears (6)
– Adjust the colour balance with the sliders. Most frames will require some warming (Cyan to the right and Yellow to the left), some will need to have magenta or green cast removed (with the middle slider)

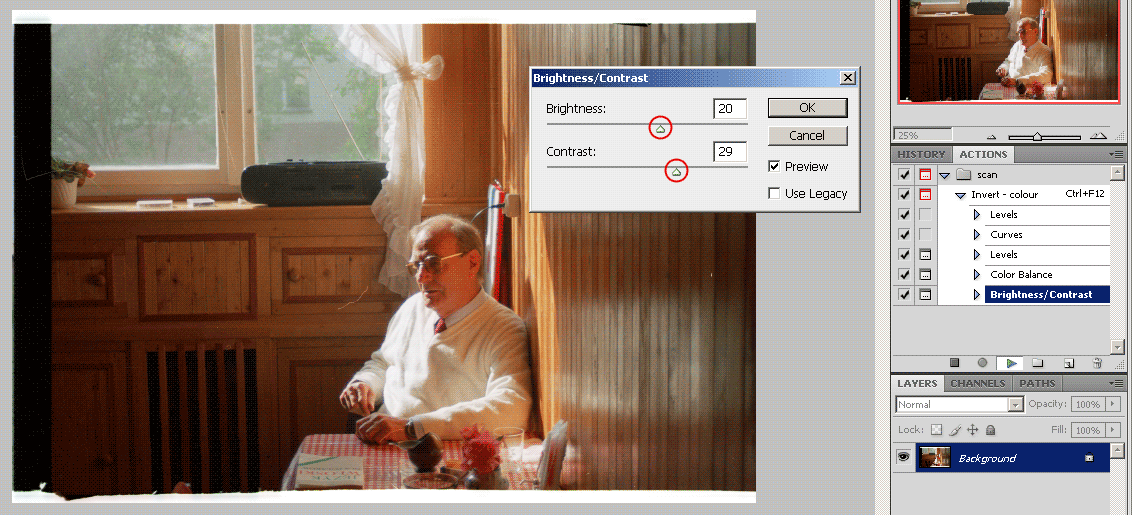
– Adjust Brightness and Contrast to taste.
– Done!
Note that for further scanning, you will need to repeat paragraphs:
A (to scan the whole roll or strip you may want to select Batch Scan: All in the Input tab)
C (only once per roll)
D (for each frame)


